Formatting Dates
Excel cannot recognize canonical date format. If the date format in the XML data is in canonical format, that is, YYYY-MM-DDThh:mm:ss+HH:MM, you must apply a function to display it properly.
One option to display a date is to use the Excel REPLACE and SUBSTITUTE functions. This option retains the full date and timestamp. If you only require the date portion in the data (YYY-MM-DD), then another option is to use the DATEVALUE function. The following example shows how to use both options.
Example: Formatting a Canonical Date in Excel
Using the Employee by Department template and data from the first example, this procedure adds the HIRE_DATE element to the layout and displays the date as shown in Column E of Figure 6-18.
Figure 6-18 The Employee by Department Template Showing the Hire Date
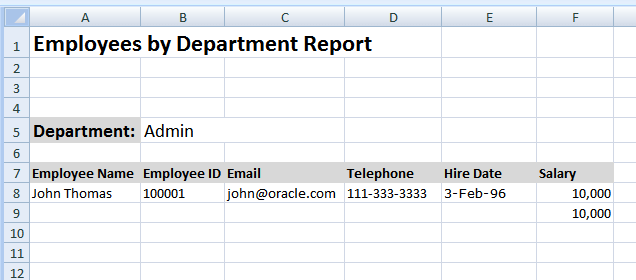
Description of "Figure 6-18 The Employee by Department Template Showing the Hire Date"
To format the date:
Add a column to the table in your layout for HIRE_DATE.
In the table row where the data is to display, use the Template Builder to insert the HIRE_DATE field.
Note:
If you are not using the Template Builder, copy and paste a sample value for HIRE_DATE from the XML data into the cell that is to display the HIRE_DATE field. For example:
Copy and paste
1996-02-03T00:00:00.000-07:00
into the E8 cell.
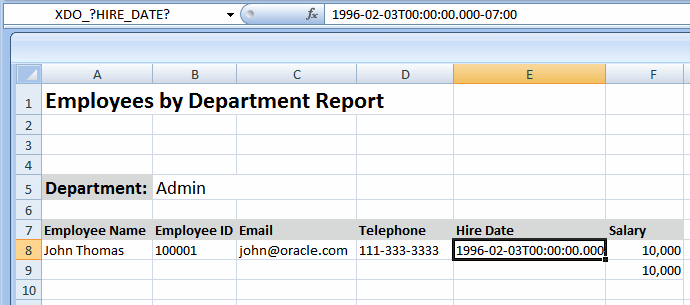
Assign the cell the defined name XDO_?HIRE_DATE? to map it to the HIRE_DATE element in the data.
The inserted field is shown in Figure 6-19.
If you do nothing else, the HIRE_DATE value is displayed as shown. To format the date as "3-Feb-96", you must apply a function to that field and display the results in a new field.
Insert a new Hire Date column. This is now column F, as shown in Figure 6-20.
Figure 6-20 The New Hire Date Column in Column F

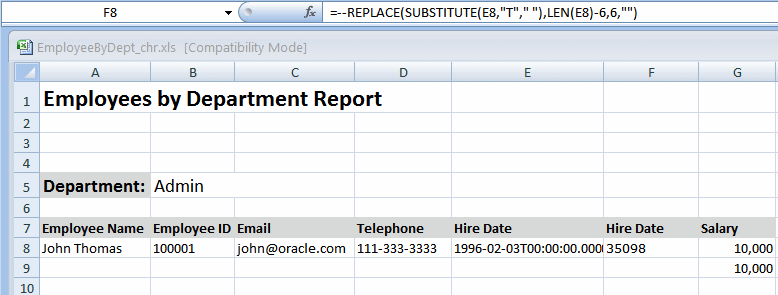
Description of "Figure 6-20 The New Hire Date Column in Column F"In the new Hire Date cell (F8), enter one of the following Excel functions:
To retain the full date and timestamp, enter:
=--REPLACE(SUBSTITUTE(E8,"T"," "),LEN(E8)-6,6,"")
To retain only the date portion (YYY-MM-DD), enter:
=DATEVALUE(LEFT(E8,10))
Notice that in both functions, "E8" refers to the cell that contains the value to convert.
After you enter the function, it populates the F8 cell as shown in Figure 6-21.
Apply formatting to the cell.
Right-click the F8 cell. From the menu, select Format Cells. In the Format Cells dialog, select Date and the desired format, as shown in Figure 6-22.
Figure 6-22 Applying the Format for the Date in the Format Cells Dialog
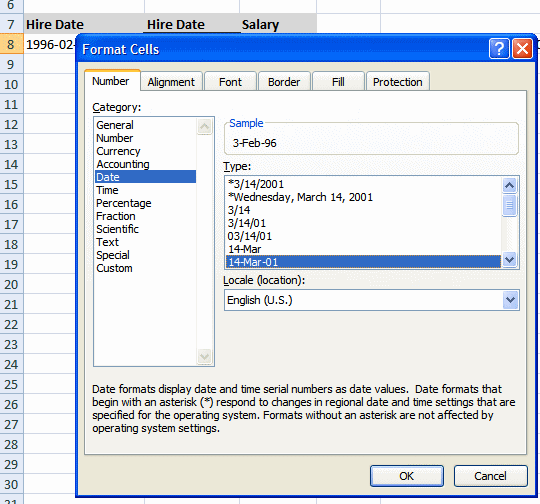
Description of "Figure 6-22 Applying the Format for the Date in the Format Cells Dialog"The sample data in the F8 cell now displays as 3-Feb-96.
Hide the E column, so that report consumers do not see the canonical date that is converted.
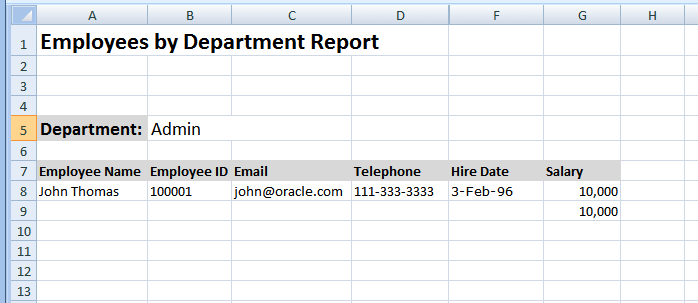
Figure 6-23 shows the template with column E hidden.
No comments:
Post a Comment